Smart Switches and Existing Wiring
2023-04-01 15:51 - General
Back in my studio apartment, I had remote control of my lights and some appliances. I used X10 devices for this, a design originally from the 1970s to pass data over power wires. Slightly newer devices also could use radio signals. The great thing is that they're very cheap, being old technology. Since they want to use the power lines to transmit the data, compatibility can be limited in a whole house scenario. (The data doesn't cross the two phases, so won't reach the whole house easily. Which part of the house is which phase can often be rather arbitrary.)
So I've been looking for a newer "smart" switch type of device I could adopt. I still want it to be inexpensive, but I also want it to work ideally over WiFi. What I don't want, however, is for it to rely on some random "cloud" service. After all The Cloud Is Just Someone Else's Computer. And that someone else will eventually stop giving you access to their computer. Examples are many: Insteon shut down their service in 2022, Nest dropped support for some of their devices in 2016, and Amazon shut down some Alexa devices in 2022. (That's just a few easy examples.) I want my devices to be network-addressable, not Internet service dependent (or even connected, to be honest).
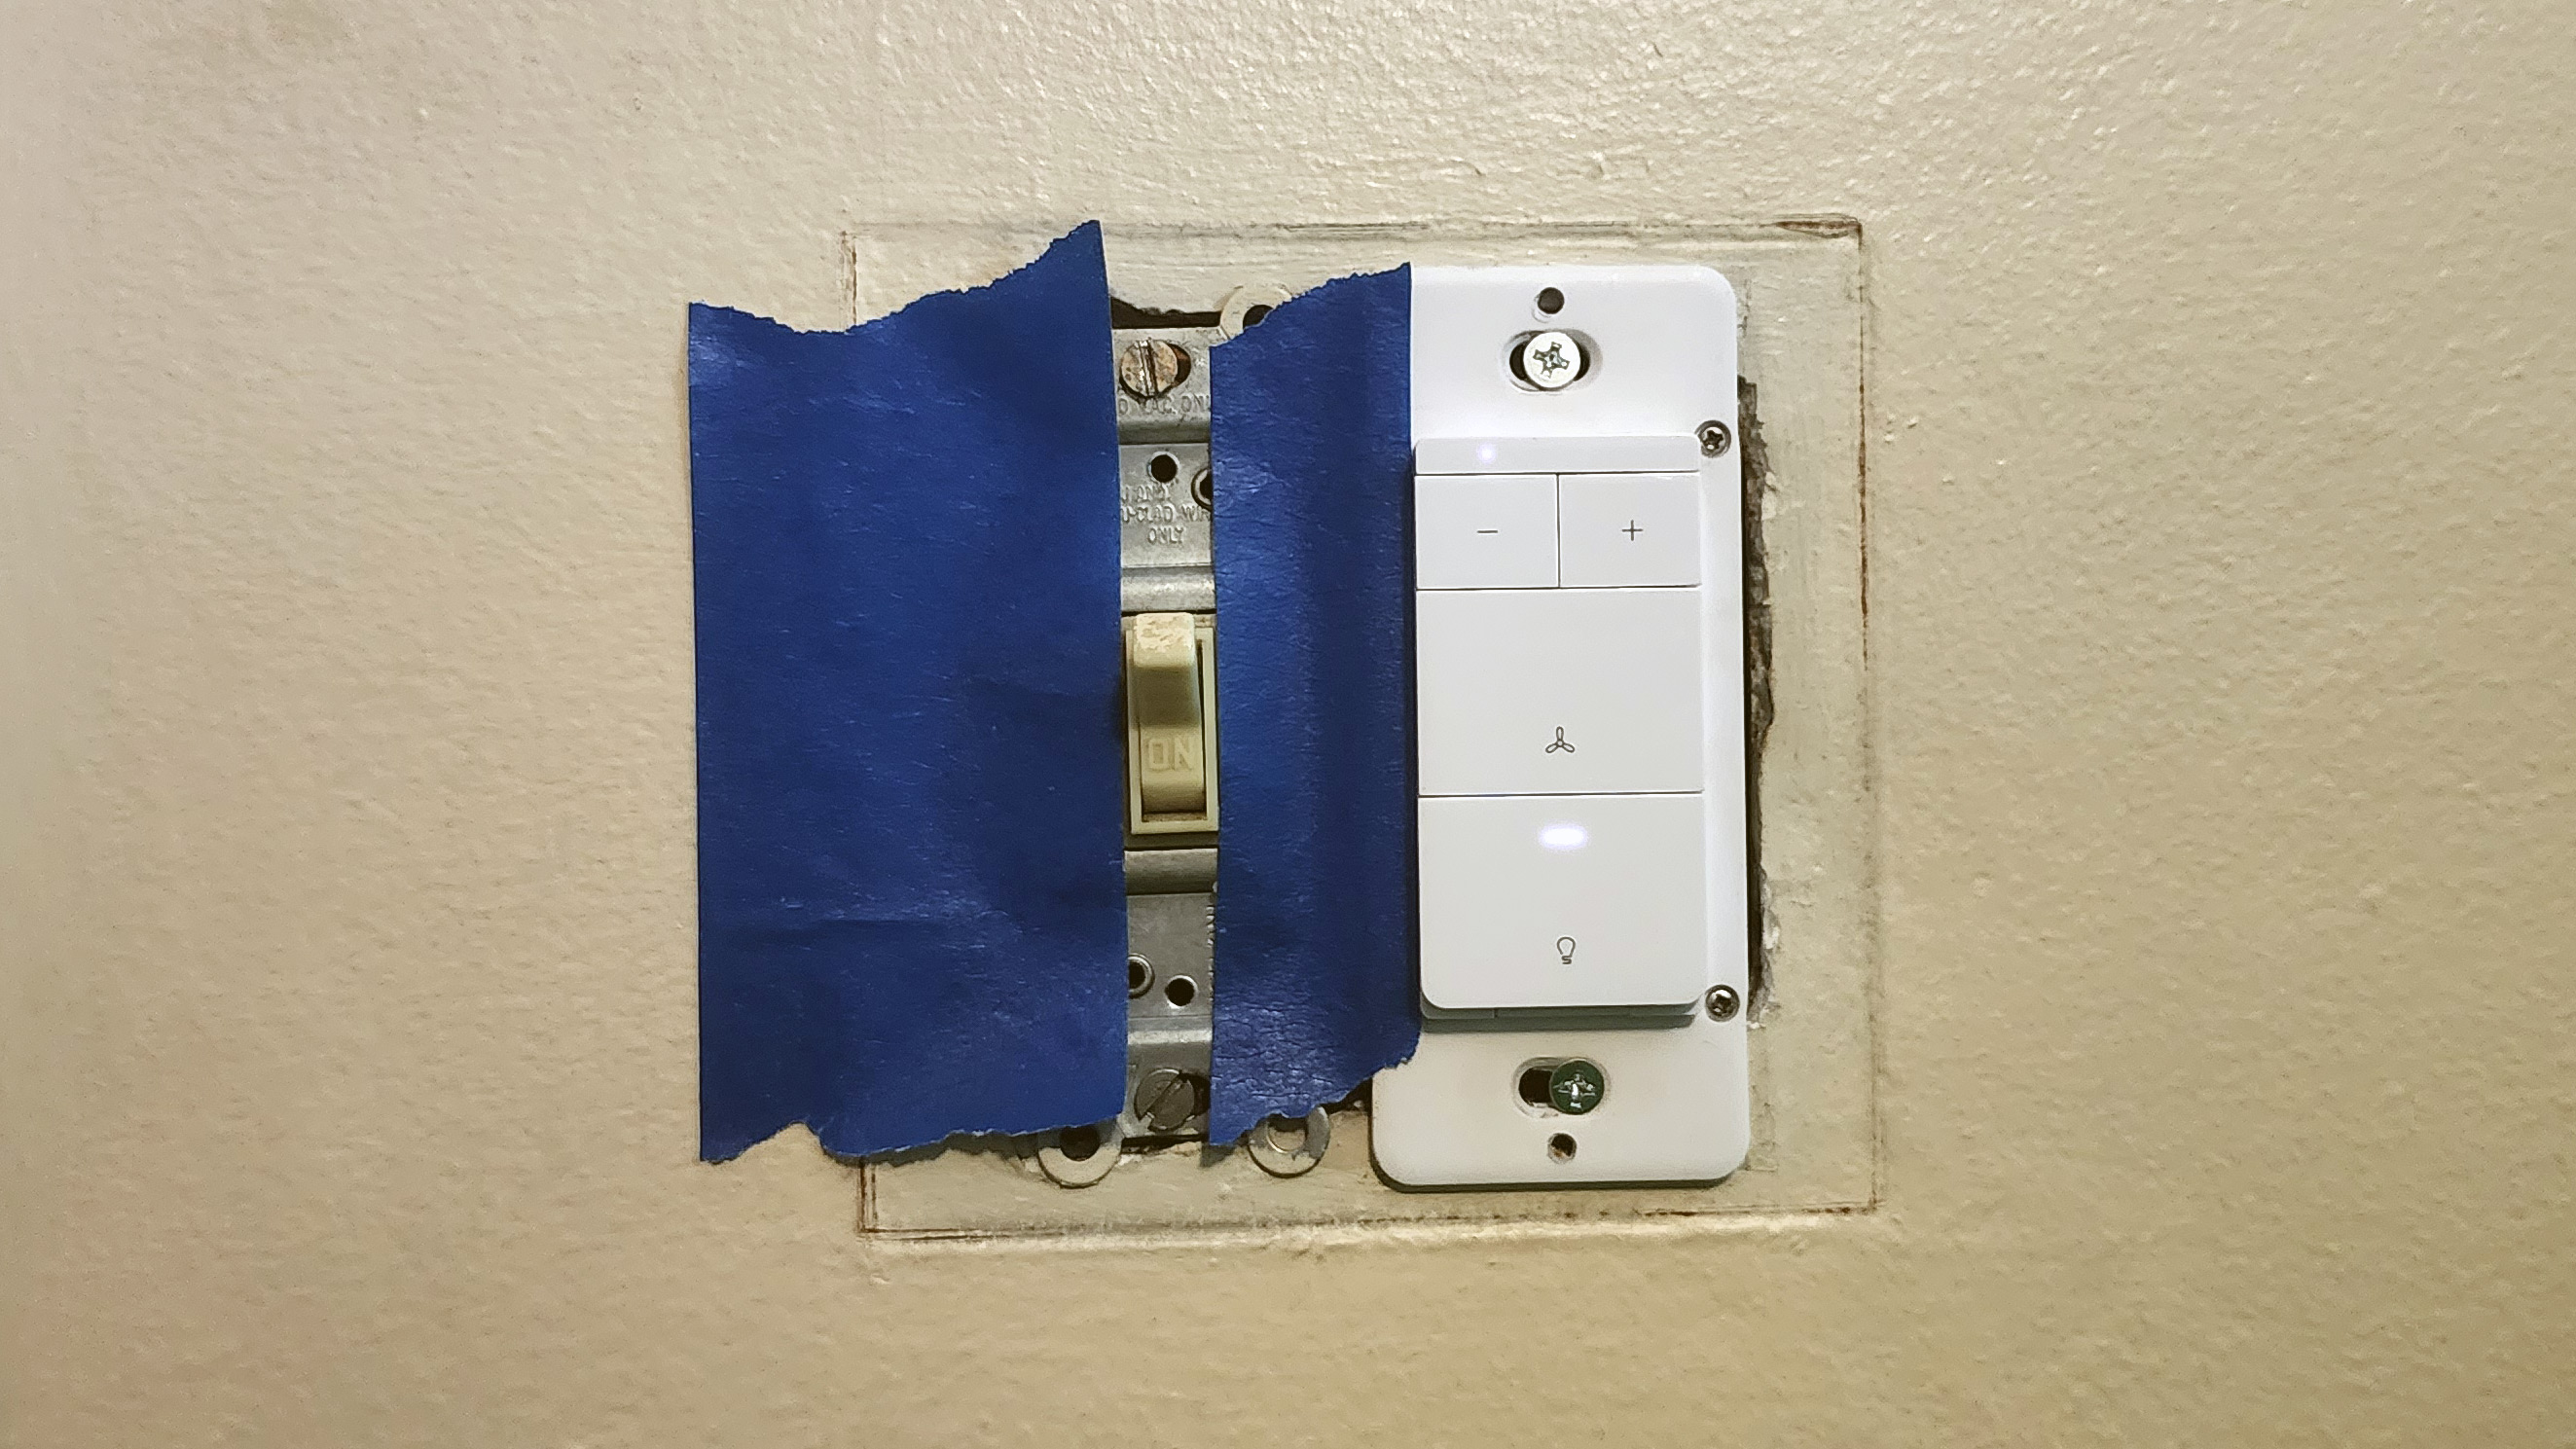
Pictured above is a Treatlife DS03 combined light dimmer and fan control switch. It is not local only. But depending on the hardware revision, it can be converted to use either Tasmota or OpenBeken — two very similar open source "smart home thing" replacements. This very sketchy and very temporary installation is my very first test device. I have it installed and running: all the buttons do what they should do, but it's also connected to my "infra" WiFi, which is firewalled to have no Internet access. (And the regular switch on the left controls the porch light.)
Installation didn't go perfectly. Behind that switch before I changed anything was one wire running through the dimmer, for the light in the ceiling fan, and a second always-hot wire for the fan with pull-chain control. I got this device and used that second wire for remote control of the fan, and everything seemed to work great. Later I discovered that an unrelated light upstairs stopped working. I've now become confident that this light was fed from the same "always hot" line which also powers the fan. This took me some time to figure out, with a few lucky breaks along the way.
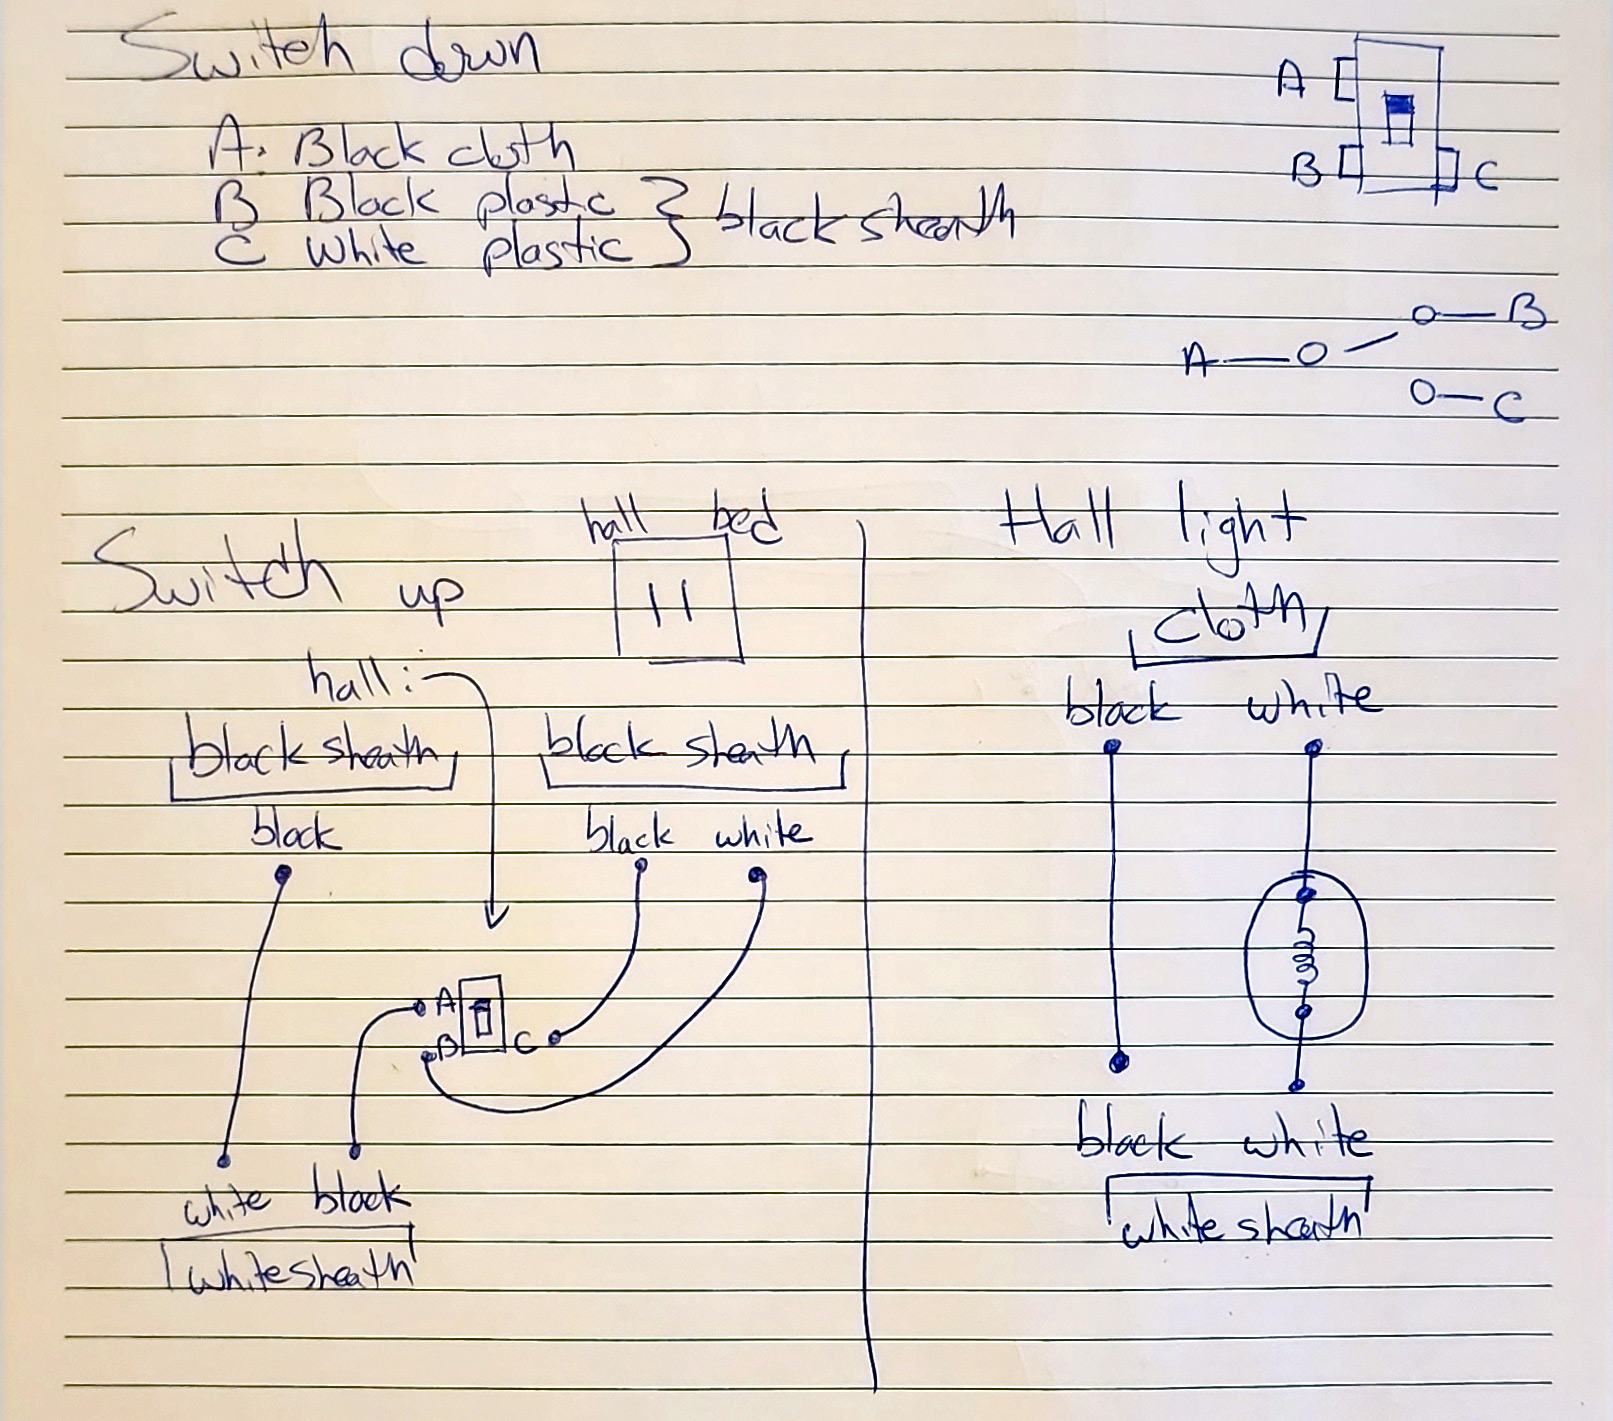
We're talking about the upstairs hallway light. It's on a three way switch: one each at the bottom and top of the stairs. One day I went upstairs, flipped the switch, and got no light. I think this was at least a week since installing the new test smart switch, and for quite some time I didn't make the connection. The first thing I did was take this diagram pictured above. After removing the fixture from the ceiling and both switches, this is what I could see behind them, and it was a big lucky break: Some original-to-the-house style cloth wrapped wires, plus some romex-style wires — some with white and some with black jackets, so I could tell them apart! The fixture had one end and the upstairs switch the other end of the only white jacket, so it was safe to assume those are connected. Then there were three other black sheaths, probably at least one connection. And some cloth, with no immediately clear pattern.
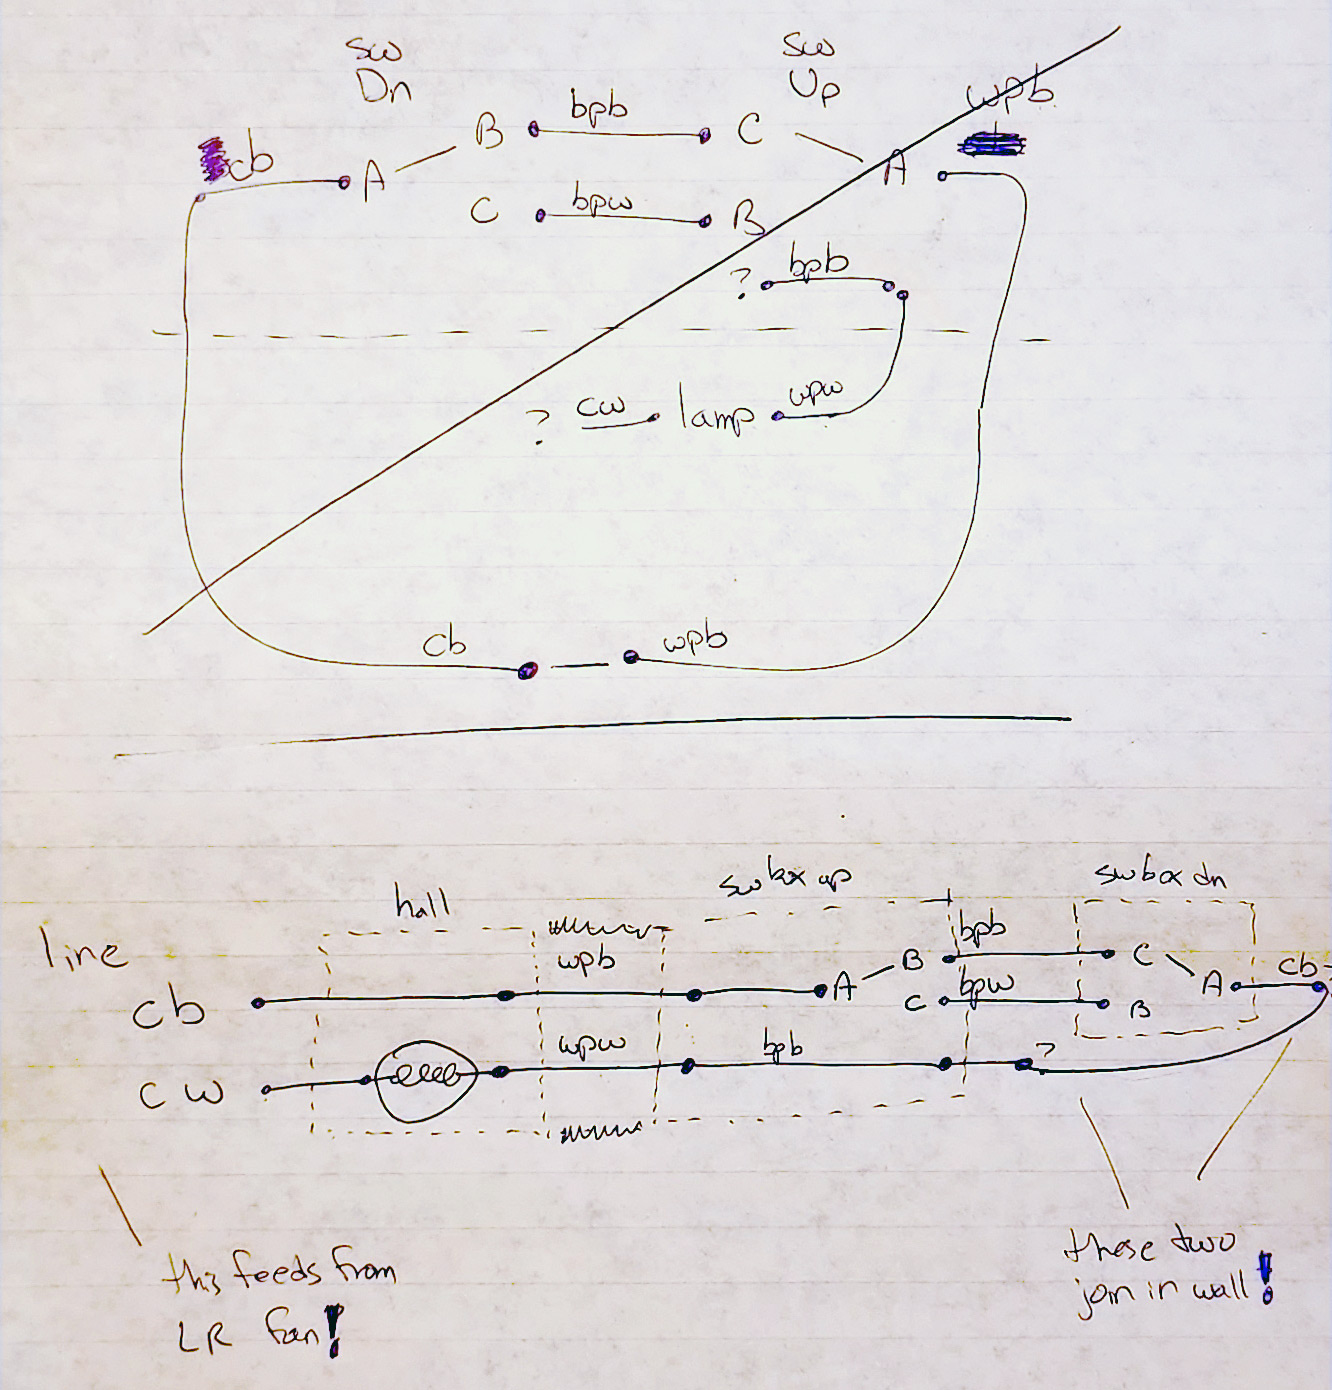
So armed with that information, I started trying to figure out how the wiring was laid out, to aid with diagnosis. The image above has one guess at top, crossed out. The second form at the bottom felt a lot better, and I'm now convinced it's accurate. At its left is the line with "cb" and "cw" (cloth wrapped white and black conductors). That, in the light fixture, goes either through a link or the lamp to the "wpb" and "wpw" (white plastic sheath, black/white conductors), which goes to the upstairs box with the switch, and so on. The pattern makes sense for a three way switch, assuming that the cloth conductors on the left are the line/supply. With nothing hooked to them anymore besides my multimeter probes, I can use the network addressable switch downstairs to watch them go from no power to full line power, as I turn the fan on and off. I also found more of the other wires, visible in the unfinished "attic" space, including where the newer romex style wire joins to the one probably original to the house (and thus, probably already there, perhaps as part of a single leg switch later upgraded to be three way) cloth wire.

So now I've got a plan for what to do! It starts with capping off the old supply line shared with the fan: I'd prefer to keep the new four-speed control of the fan with no pull chain dangling in the middle of the room. Instead I add, in the mentioned attic space (which already has a light and outlet for me to pull the supply from) a new feed. It goes into the upstairs switch box, which backs into this space. The switch loop remains mostly the same, with the supply being injected at the upstairs switch, rather than at the light fixture.
Presto! I actually lucked out quite a bit to have a neutral wire in the switch box, as the smart switch needs it. This house is from the 1940s and apparently this wasn't typical until the 80s or so. I haven't actually checked all the other switch boxes yet: see the sketchy temporary install of this one switch. I've decided I like this line of switches, but I haven't completely planned out how many I want, and of what type: they come in standard on/off switches plus three way compatible variants of that, dimmers and three way compatible dimmers, two different button designs for each kind of dimmer, and the dimmer/fan combo I've got (at least!).